Τετάρτη 3 Σεπτεμβρίου 2008

Google Browser

Νέος Browser από την Google

Σε μια κίνηση που φαίνεται να αναβιώνει τον «πόλεμο των browser» της δεκαετίας του 1990, η Google παρουσιάζει το δικό της, δωρεάν πρόγραμμα πλοήγησης στο Διαδίκτυο, μέσω του οποίου ελπίζει να εδραιώσει την κυριαρχία της εις βάρος της Microsoft.

Το νέο πρόγραμμα, με την ονομασία Chrome, αναμένεται να είναι διαθέσιμο αργότερα την Τρίτη σε δοκιμαστική μορφή για υπολογιστές που τρέχουν Windows, ενώ οι αντίστοιχες εκδόσεις για Mac OS X και Linux αναμένονται αργότερα.

Το Chrome έχει σχεδιαστεί για ταχεία διαχείριση και προβολή ιστοσελίδων με δυναμικό περιεχόμενο, βίντεο ή άλλες απαιτητικές εφαρμογές.

«Συνηδητοποιήσαμε ότι ο Παγκόσμιος Ιστός έχει εξελιχθεί από τις απλές σελίδες κειμένου σε πλούσιες, διαδραστικές εφαρμογές, και ότι έπρεπε να επανασχεδιάσουμε τον browser από την αρχή» σχολιάζει ο αντιπρόεδρος του τμήματος παραγωγής της Google, Σιντάρ Πιτσάι, στο εταιρικό blog της Google όπου έγινε η ανακοίνωση για το Chrome.

Το νέο πρόγραμμα προσφέρει ακόμα τη λειτουργία «incognito» που διασφαλίζει την ανωνυμία των χρηστών μέσω ενός ειδικού παράθυρου. «Τίποτα από ό,τι συμβαίνει μέσα στο παράθυρο δεν καταγράφεται στον υπολογιστή σας» αναφέρει η Google.

Οι μηχανικοί της εταιρείας βασίστηκαν σε υλικό από μια ποικιλία προγραμμάτων ανοιχτού κώδικα, όπως το WebKit της Apple και ο Firefox του ιδρύματος Mozilla. O κώδικας του τελικού προϊόντος θα είναι ανοιχτός σε άλλους προγραμματιστές για τη βελτίωση και την επέκτασή του, ανακοίνωσε η Google.

Ενα ακόμα ατού του Chrome είναι μια νέα μηχανή για τη φόρτωση κώδικα JavaScript V8, η οποία έχει σχεδιαστεί να τρέχει τις μελλοντικές, διαδραστικές υπηρεσίες του Παγκόσμιου Ιστού.

Μέχρι σήμερα, η Google προσπαθούσε να υπονομεύσει τον Internet Explorer της Microsoft υποστηρίζοντας τον ανταγωνιστικό Mozilla Firefox, o oποίος έχει καταφέρει να κερδίσει πάνω από το 10% της αγοράς. Η Google πρόσφατα ανανέωσε τη συνεργασία της με το Ίδρυμα Mozilla μέχρι το 2011.

Τα αποκαλυπτήρια του Chrome έρχονται περίπου μία εβδομάδα μετά την παρουσίαση μιας δοκιμαστικής έκδοσης του νέου Internet Explorer. Η έκδοση 8 μεταξύ άλλων δίνει στους χρήστες την επιλογή να καλύπτουν τα ίχνη τους στο Διαδίκτυο και να κρύβουν τις προτιμήσεις τους από τη Google και άλλες εταιρείες που δραστηριοποιούνται στη διαδικτυακή διαφήμιση.

Η Google φαίνεται να ανησυχεί ότι η Microsoft θα μπορούσε να καταχραστεί την κυριαρχία της στην αγορά των browser και να ρυθμίσει τον IE έτσι ώστε να περιορίσει την κίνηση προς τη μηχανή αναζήτησης της Google.

Το 2006, η Google κατήγγειλε στο αμερικανικό υπουργείο Δικαιοσύνης ότι η Microsoft είχε προχωρήσει σε αλλαγές του λογισμικού που καθιστούν δυσκολότερη την εγκατάσταση ανταγωνιστικών εργαλείων αναζήτησης.

Αν και η Δικαιοσύνη αποφάσισε να μην παρέμβει, η Microsoft προχώρησε σε αλλαγές στον τρόπο που ο IE διαχειρίζεται τις διαθέσιμες εργαλειοθήκες.

H διεύθυνση του Google Chrome http://www.google.com/chrome δεν είναι ακόμα διαθέσιμη το μεσημέρι της Τρίτης.


Πηγή: http://www.in.gr

H beta version έχει βγεί!!!
Το δοκίμασα και είναι αρκετά γρήγορο και εύχρηστο!!! ααα και δεν ειναι Microsoft... :) :D :) :D

Τρίτη 5 Αυγούστου 2008

UBUNTU Hardy Heron 8.04//UBUNTU Intrepid Ibex 8.10


Kαι πώς να μην αναφερθώ στα Ubuntu !!! Που όταν άρχισα να ασχολούμαι ήθελα να πετάξω το PC από το μπαλκόνι !! Ολο repositories και updates το πυρήνα και ...και ...και !!!Καλά ήταν και τα Windows , όλα έτοιμα τα βρίσκαμε !!
Τώρα όμως η γνώμη μου μετά από ατελείωτες ώρες κολυμπητού στον ωκεανό του ανοικτού λογισμικού έχει πάρει παντελώς την αντίθετη κατεύθυνση !
Στο άρθρο αυτό θα γίνει μία γρήγορη αναφορά στη καινούργια έκδοση Ubuntu 8.04 Hardy Heron...

Η νέα έκδοση Ubuntu με όνομα Hardy Heron ετοιμάζεται με ταχύτητα και ήδη είναι διαθέσιμη η Alpha 3 έκδοση του λειτουργικού, για όσους θέλουν να δοκιμάσουν και να παίξουν με cutting edge τεχνολογίες. Η νέα έκδοση 8.04 περιλαμβάνει Xorg 7.3, kernel 2.6.24-3.5 που ενεργοποιεί power saving για επεξεργαστές amd64, ενεργοποιημένο το PulseAudio, PolicyKit και φυσικά Firefox 3 Beta 2.

Θα βρείτε εδώ όλα τα απαραίτητα links και πληροφορίες για download και feedback προς την ομάδα των developers που εργάζονται σκληρά για το νέο Ubuntu Hardy Heron. Για upgrade από Ubuntu 7.10, μπορείτε να τρέξετε την εντολή “update-manager -d” χρησιμοποιώντας το update-manager package από την έκδοση Gutsy.


KAI ΙΔΟΥ ΤΑ ΝΕΑ......

Ubuntu 8.10 Intrepid Ibex

Εντάξει, πάρτε βαθειές ανάσες και κατανοήστε ότι το Ubuntu 8.10 με κωδικό όνομα Intrepid Ibex πρόκειται για alpha release. Αν αυτό γίνει αντιληπτό μπορείτε να συνεχίσετε την ανάγνωση του άρθρου χωρίς το σύνδρομο υστερίας που καταλαμβάνει μερικά Apple fanboys και εξαπλώνεται παντού.

Αφού φτάσατε μέχρι εδώ, θα πρέπει να μάθετε ότι στυλιστικά (Theme) η νέα διανομή θα είναι μάλλον αρκετά διαφορετική. Δοκιμάζεται και είναι στόχος να πετύχει η ομαλή λειτουργεία με επεξεργαστές Intel Atom ώστε το Ubuntu να αρχίζει να παίζει εύκολα και επισήμως πλέον σε subnotebooks και ultraportables με αποδεκτά αποτελέσματα και user experience.

Το Intrepid Ibex έρχεται με νέο kernel, OpenOffice.org 3 και βελτιωμένο KDE μαζί με βελτιωμένο χρόνο εκκίνησης ειδικά στις mobile συσκευές. Αν όλα αυτά δουλέψουν όπως πρέπει, η νέα διανομή θα είναι έτοιμη στα τέλη Οκτωβρίου.

Οι τολμηροί και παιχνιδιάρηδες μπορούν να κατεβάσουν την alpha Intrepid Ibex έκδοση εδώ.


OpenSUSE 11.0


Μόλις είδα πως έχει κυκλοφορήσει το openSUSE 11 ένιωσα κάτι πολύ παραπάνω απο χαρά !!!Θα θελα να το μοιραστώ μαζί σας αλλά θα με κατηγορήσουν για ανάρμοστη συμπεριφορά ! Μα πώωωςςςςς να μην αντιδράσεις σαν τρελός ??!!??!!


To openSUSE διαθέτει:


  • KDE 4
  • GNOME 2
  • XFCE 4
  • Linux kernel 2.6.25.4
  • OpenOffice.org 2.4
  • Firefox 3.0
  • κι άλλα !

Screenshots


Το παραπάνω είναι για KDE...


...κι αυτό που ακολουθεί τώρα με GNOME.

Πιο πολλά screenshots Ε-Δ-Ω

Για περισσότερα...

Για περισσότερα δείτε το άρθρο από το openSUSE.org. Δείτε τις δυνατότητες της διανομής Ε-Δ-Ω.

Αν θέλετε να πάτε αμέσως για download επισκευθείτε αυτήν την σελίδα. Επίσης να σας πω πως έχει νέο installer. Περισσότερα για τον νέο Installer κοιτάξτε εδώ.

Τι είναι openSUSE ;

Αν δεν γνωρίζετε openSUSE είναι μια διανομή Linux σαν το Ubuntu και το Fedora.


Debian: Apache Sites

Enable or disable a (preconfigured) Apache Website

This little script will allow you to either enable or disable a website running on Apache2 WebServer on debian linux.
Background

In Debian Sarge 3.1, the main configuration file for apache2 is located in /etc/apache2 and is called, surprisingly, apache2.conf . There is also the httpd.conf file for compatibility reasons.

What is interesting however, is that there is a configuration file for each site you make available in apache:

* Configuration files for virtual sites are located in the folder /etc/apache2/sites-available
* To make a site visible to the web server you make a symbolic link of its configuration file in the folder /etc/apache2/sites-enabled

(A similar scheme is also used for enabling modules)
Usage

site { on | off | status }

The script when called with on creates the appropriate symbolic link and when called with off deletes it. It also restarts the Apache server so the changes are reflected.
Examples

site wiki on

Will enable site named wiki. The configuration file wiki must exist in /etc/apache2/sites-available

site wiki off

Will disable site named wiki. The configuration file wiki must exist in /etc/apache2/sites-enabled

The script will report whenever it cannot find the appropriate configuration file. It will also report when an attempt is made to enable an already enabled site or disable an already disabled or non-existent site.

site wiki status

This will report whether the site name wiki is enabled or disabled
Script

Save the following script with the name site to an appropriate place, e.g. /sbin or /usr/sbin. Super user rights are required for execution, since the script restarts Apache after an on or off command. (status may be run by normal user). I suggest you run it with sudo and possibly make it available for users that may need to turn on or off their website.

#!/bin/sh
# site name {on | off | status }
# e.g. site mysite on -> activate mysite
# Control any site
# requires sudo or root privelege when used
# with on or off switches (reloads apache)
#
# (C) by CyberToxic pigi apo Manolis Kiagias
#
if [ ! -f /etc/apache2/sites-available/$1 ]; then
echo "Site does not exist!"
exit 1
fi


case "$2" in
on)
echo "Enabling $1 site..."
if [ -f /etc/apache2/sites-enabled/$1 ]; then
echo "Already enabled!"
else
ln -s /etc/apache2/sites-available/$1 /etc/apache2/sites-enabled/$1
/etc/init.d/apache2 restart
echo "done!"
fi
;;
off)
echo "Disabling $1 site..."
if [ -f /etc/apache2/sites-enabled/$1 ]; then
rm /etc/apache2/sites-enabled/$1
/etc/init.d/apache2 restart
echo "done!"
else
echo "Already disabled!"
fi
;;
status)
echo -n "Current status of $1 site: "
if [ -f /etc/apache2/sites-enabled/$1 ]; then
echo "ENABLED"
else
echo "DISABLED"
fi
;;
*)
echo "Usage: /usr/sbin/site name {on|off|status}"
exit 1
;;
esac
exit 0

Assumptions

The script assumes the following:

* Your distribution is using the Apache configuration scheme described above. This is true for Debian 3.1 and may be true for other distros / versions as well.
* You have su privileges. You need to either sudo or su to execute this script (unless using the status option).
* You do really understand what you are doing! (This is a prerequisite for ALL my scripts...)

Retrieved from "http://debian12.dyndns.org/index.php/Debian:Apache_Sites"
Views

* Project page
* Discussion
* View source
* History

Personal tools

* Log in / create account

Debian Content

* Useful scripts
* Tutorials
* Workarounds
* Quick Tips

Navigation

* Main Page
* Community portal
* Current events
* Recent changes
* Random page
* Help
* Donations

Search

Toolbox

* What links here
* Related changes
* Upload file
* Special pages
* Printable version
* Permanent link

Powered by MediaWiki

* This page was last modified 19:50, 25 July 2006.
* This page has been accessed 213 times.
* Privacy policy
* About Debian

Debian : Bittorrent Ports Script

Oρίστε λοιπόν ο πιο κατάλληλος τρόπος προκειμένου να ελέγξετε τις πόρτες για το πρόγραμμα bittorrent !!

Controlling bittorrent ports

You are running linux, so you are probably running a firewall based on iptables. This script will allow you to open / close incoming ports for the widely used bittorrent program. I am running the console and curses version of bittorrent on one my machines to download torrents (and yes, even for torrents, command line rules!) and I have written this little script to open the appropriate ports in the firewall and close them again when the download ends. (Actually, they are closed automatically by a cron job).

The script will have to be modified for your network setup. An explanation follows.
Usage

Copy the script that follows to a file and save it as bit-ports. An appropriate location would be /sbin or /usr/sbin

Examples:

bit-ports open

bit-ports close

Script

#! /bin/sh
#
# Bittorrent firewall ports control
# (C) by CyberToxic pigi apo Manolis Kiagias
#
case "$1" in
'open')
if [ -z "$(/sbin/iptables-save |grep 6881:6889)" ]; then
/sbin/iptables -I INPUT 3 -d 192.168.0.21 -p tcp -m tcp --dport 6881:6889 -j ACCEPT
echo "Bittorrent ports now OPEN in system firewall."
else
echo "Bittorrent ports already open!!!"
fi
;;
'close')
if [ -n "$(/sbin/iptables-save |grep 6881:6889)" ]; then
if [ -z "$(ps aux |grep bittorrent |grep -v grep)" ]; then
/sbin/iptables -D INPUT -d 192.168.0.21 -p tcp -m tcp --dport 6881:6889 -j ACCEPT
echo "Bittorrent ports now CLOSED in system firewall."
else
echo "Bittorrent is running. Ports will NOT close!"
fi
else
echo "Bittorrent ports already closed!!!"
fi
;;
*)
echo "Usage: bit-ports [open|close]"
exit 1
;;
esac
exit 0

Bittorrent console uses tcp ports 6881 to 6889 for incoming connections. The script opens these ports when called with the 'on' switch and closes them when called with the 'close' switch. It will not close the ports if bittorrent is running!
Assumptions

The script assumes the following:

* Your linux box is behind a router and has an internal address of 192.168.0.21. Modify this to your own IP address.
* The iptables command is located in /sbin. This is true for most distros (debian included).
* You have su privileges. You need to either sudo or su to execute this script since it modifies iptables rules.
* You do really understand what you are doing! (This is a prerequisite for ALL my scripts...)

Θέλατε Firewall για Linux ?? Το 'χετε λοιπον !!!

Το παρακάτω άρθρο αποτελεί ένα firewall script για τον καθένα ! Απλά δοκιμάστε το !!!


Απλό αλλά θαυματουργό...


A Firewall Script for Everyone

Every server / desktop machine needs a firewall these days. Fortunately, Linux comes with iptables which can be used to create a very powerful firewall. Usually a set of rules is created, saved to a file and reloaded everytime the system comes up. This is where this little script comes into play. It loads a script containing Firewall Rules saved to the file /etc/iptables/iptables.conf (actually you can save your rules anywhere you wish, just modify the location in the script. It simply looks like a reasonable location to me). If your server is already behind an e.g. ADSL router you already have a firewall and the extra rules you need will be pretty straightforward to write yourself instead of using a wizard.

Usage

Copy this script to a file named myfirewall (or whatever you like!) and save it to the standard location for init scripts, in debian /etc/init.d. Don't forget to make it executable, i.e. chmod 755 /etc/init.d/myfirewall. The script accepts the standard init script parameters, start and stop. It also supports show which will simply show you the firewall rules on screen. Be aware that root privileges are required for the script to run since modifying the iptables is not something allowed to a normal user. Typically though, once your Firewall Rules are set, the script will be called during boot. For this you will need to enter:

update-rc.d myfirewall defaults

as root

Script

#! /bin/sh

# /etc/init.d/myfirewall
#
# (C) by CyberToxic pigi apo Manolis Kiagias

case "$1" in
start)
echo "Starting firewall (iptables)."
/sbin/iptables-restore ;;
stop)
echo "Stopping firewall (flushing rules)"
/sbin/iptables -F
;;
show)
echo "Current firewall rules:"
/sbin/iptables-save
;;
*)
echo "Usage: /etc/init.d/myfirewall {start|stop|show}"
exit 1
;;
esac
exit 0

Assumptions

The script assumes the following:

  • You are not running any other firewall and you are willing to write iptables rules.
  • The iptables command is located in /sbin. This is true for most distros (debian included).
  • You have su privileges. You need to either sudo or su to execute this script since it modifies iptables rules and will be installed as an init script.
  • You do really understand what you are doing! (This is a prerequisite for ALL my scripts...)

Ubuntu 7.10 (Gutsy) ATI Graphic Card Installation

Installation

For most users it won't be necessary to go into installation and configuration details of the driver. Ubuntu 7.10 (Gutsy) provides a notification saying that there are restricted drivers available. You just have to go there (Restricted Drivers Manager) and enable the "ATI accelerated graphics driver". Ubuntu will then install and configure the driver for you. If this does not provide the optimal solution you were looking for, please read ahead.

Method 1: Install the Driver the Ubuntu Way

This will install the driver that is currently in the repositories. It may be older than the current version from AMD.

sudo apt-get update 
sudo apt-get install linux-restricted-modules-generic restricted-manager
sudo apt-get install xorg-driver-fglrx
sudo depmod -a

The second line of the above may not be necessary. If apt says it cannot find the "linux-restricted-modules" package, try line 3. If that fails, check your sources.list (see top of page)

If the system complains about dependencies, use your preferred package manager to download python2.4 and, if necessary, its dependencies.

Method 2: Install the Catalyst 8.4 Driver Manually

This is just an alternative installation method for the section above. It might help if you still get 'DRI missing' errors.

Download the ATI driver installer: ati-driver-installer-8-4-x86.x86_64.run (this installer is for 32bit and 64bit systems)

Change to the directory you downloaded the file. Make sure that you have the universe and multiverse repositories enabled in /etc/apt/sources.list before doing these steps.

There is a detailed manual with screenshots at Ubuntu Wiki.

By default, Ubuntu did not enable the Universe and Multiverse repositories, but now in Gutsy, both Universe and Multiverse are activated by default.

Install necessary tools:

sudo apt-get update
sudo apt-get install build-essential fakeroot dh-make debhelper debconf libstdc++5 dkms linux-headers-$(uname -r)

Uninstall previous fglrx: Using Synaptic, completely remove any packages containing "fglrx" in their name.

If using 64bit make sure to collect package "ia32-libs" before you continue!

Create .deb packages:

sudo sh ati-driver-installer-8-4-x86.x86_64.run --buildpkg Ubuntu/gutsy

note: if this step fails with a signal being caught, and you are running the script on an NFS-mounted directory, copy it to a local partition, and it will work. The same error may result from insufficient disk space.

As an alternative, you can just use

sudo sh ./ati-driver-installer-8-4-x86.x86_64.run --buildpkg Ubuntu --autopkg

which will download all the needed packages by itself and also automatically detects the Ubuntu version used.

If this step fails on amd64/x86_64 with a No such file or directory message about missing files in X11R6/lib, follow these instructions and come back here. Also check that your download path does not contain spaces.

Blacklist old fglrx module from linux-restricted-modules:

As Ubuntu Gutsy's linux-restricted-modules package includes the fglrx module from an old driver version (8.37.6), we have to blacklist this module to make sure the new kernel module which is needed by the new driver will be used instead.

Ubuntu/Gnome users type in:

gksu gedit /etc/default/linux-restricted-modules-common

Kubuntu/KDE users type in:

kdesu kate /etc/default/linux-restricted-modules-common

Add "fglrx" to the line "DISABLED_MODULES"

File: /etc/default/linux-restricted-modules-common
DISABLED_MODULES="fglrx"

Please note that after the modification above, the "Restricted Driver Manager" will signal "ATI accelerated graphics driver" not enabled (unticked). This is perfectly correct. At the end of the installation procedure it will signal in Status: "in use" (green light), but NOT enabled. It simply means that the fglrx module contained in the linux-restricted-modules package is not enabled, but another fglrx module (8.4) is in use.

You may also need to edit the file (if it exists):

gksu gedit /etc/modprobe.d/blacklist-restricted

Put a # in front of the line "blacklist fglrx", if it is present. Otherwise, the kernel module will not load automatically, and you will not get 3D acceleration.

Remove any old fglrx debs from /usr/src/:

sudo rm /usr/src/fglrx-kernel*.deb

Install .deb packages:

sudo dpkg -i xorg-driver-fglrx_8.476-0*.deb fglrx-kernel-source_8.476-0*.deb fglrx-amdcccle_8.476-0*.deb

Additional 64-bit instructions

If you have a 64 bit install, the above dpkg command will likely complain that "Errors were encountered while processing: fglrx-amdcccle". This is because of a dependency of the amdccle package on 32 bit libraries. If you receive this error, issue the following command after the above dpkg command, which will force the installation of all of the 32 bit dependencies, and then the amdccle package:

sudo apt-get install -f

Catalyst 8.3 on 64-bit systems requires the --force-overwrite command in the above dpkg command:

sudo dpkg -i --force-overwrite xorg-driver-fglrx_8.476-0*.deb fglrx-kernel-source_8.476-0*.deb fglrx-amdcccle_8.476-0*.deb

Troubleshooting Installation Errors

Kernel -rt users

If you are running the -rt kernel, you will fail to compile the kernel module with "FATAL: modpost: GPL-incompatible module fglrx.ko uses GPL-only symbol '__rcu_read_lock'". Follow the instructions on 64bitstudio.com for a workaround.


Missing kernel sources

Error! Your kernel source for kernel 2.6.22-14-386 cannot be found at
/lib/modules/2.6.22-14-386/build or /lib/modules/2.6.22-14-386/source.

You must install the specific headers package for your kernel:

$ uname -r
$ sudo aptitude install linux-headers-2.6.22-14-386

Where "2.6.22-14" is the version reported by uname.


Bad file descriptor

If you get a 'Bad file descriptor' message concerning the xorg.conf file try switching user to root and repeating the same command without sudo. This might be valid for the following commands too. (Ubuntu Gutsy installs with no password set for root by default. You can set a password for the root by typing 'sudo passwd root' first.)

Configure the Driver

  • NOTE THIS WILL ERASE SETTINGS IN /etc/X11/xorg.conf you should be sure there is a backup.
  • Note Method 2 Users: Before you carry out this step you must reboot your machine. Or else the fglrx driver will not be in use on xorg.conf and using the aticonfig options will cause a memory dump and not intialise the Driver properly.
  • Note: An alternative to the aticonfig --initial command is to edit /etc/X11/xorg.conf and replace the string "ati" with "fglrx" in the "Device" section. This way you won't lose your old "Screen" and "Monitor" settings. Afterwards you can use aticonfig for setting overlay etc. Another alternative is aticonfig --initial --force if you encounter issues with the first command.
sudo aticonfig --initial

Then:

sudo aticonfig --overlay-type=Xv
  • Note: Alternative in the overlay-type to "Xv" can be "opengl" or "disable" if the TV-out makes problems in videos.

Alternative: Configure the Driver, The Manual Way:

An alternative to the "sudo aticonfig" commands is to edit "/etc/X11/xorg.conf" and change the "Device" section for the video card as shown below. This way you won't lose your old settings.

gksu gedit /etc/X11/xorg.conf
Section "Device"
[...]
# Driver "vesa"
Driver "fglrx"
Option "VideoOverlay" "on"
Option "OpenGLOverlay" "off"
[...]
EndSection


TV - Out

The composite TV-Out is not working simultaneously with the VGA on my System. To use it I have turned the VGA off and only the TV on. Attention! This command turns off your Monitor!!

sudo aticonfig --enable-monitor=tv

To change back to VGA:

sudo aticonfig --enable-monitor=crt1

Some have had luck with both mirrored.

sudo aticonfig --force-monitor=crt1
sudo aticonfig --enable-monitor=crt1,tv

reboot after that and it should mirror the CRT1 onto the TV.

Finish the Installation

Now save any open document and reboot your system:

sudo shutdown -hr now
  • Note: An alternative to rebooting is to restart the X Server by pressing your CTRL ALT BACKSPACE keys. You must remove any old kernel modules such as "drm" "radeon" or "fglrx" using the "rmmod" command. Example: sudo rmmod fglrx
  • Note: Another way to reboot:
sudo reboot

Post-Installation Checks and Tweaks

Verifying

Run the following command to check its output to ensure the fglrx driver is installed properly:

64bit Users only ( 32bit users can continue to the fglrxinfo test ), after rebooting you may have noticed that you cant open aticonfig and the fglrxinfo test below may not show ati in the info from the test, to fix this in terminal do the following command

sudo ln -s /usr/lib/libGL.so.1.2 /usr/lib/libGL.so.1
$fglrxinfo
display: :0.0 screen: 0
OpenGL vendor string: ATI Technologies Inc.
OpenGL renderer string: ATI MOBILITY RADEON X300
OpenGL version string: 2.1.7415 Release

The OpenGL vendor string should read ATI and not Mesa.

If it still says Mesa and not ATI, even after re-enabling the driver from the Restricted-manager: You can try the following:

  • $ less /var/log/Xorg.0.log |grep EE
    if this command returns (EE) fglrx(0): incompatible kernel module detected - HW accelerated OpenGL will not work then remove the kernel module and reinstall it.
$ sudo dkms remove -m fglrx -v 8.471 --all
  • Remove all the packages provided by the xserver-xorg-video-all meta-package (search for it using Synaptic or Adept), then restart the machine. The X Server should now use the new fglrx driver by force (provided the driver is being used in xorg.conf).
If you can't log in after this, you'll have to log in to a terminal in the login screen, and reinstall the xserver-xorg-video-all package. Your problem is probably somewhere else. (taken from [1]).
  • Remove the package xserver-xgl.
Explanation: If you installed this previously in order to make compiz work, it will not allow direct rendering on your display. You can check out if this is what it causing the problem by running
DISPLAY=:0 glxinfo | grep render
If it returns an ATI renderer, it means that xgl is being displayed indirectly on the display 1. (Taken from [2])
Warning: This might make your compiz stop working as it is configured to use XGl. A solution might be to run the Envy script in order to configure compiz.

Note: Here is the glxinfo of a good install (for those interested).

Enable laptop mode on battery power

Enabling laptop mode on battery power gives you much better battery life, however be aware that sometimes it causes odd hangs.

Switch ENABLE_LAPTOP_MODE to true

File: /etc/default/acpi-support
# Switch to laptop-mode on battery power - off by default as it causes odd
# hangs on some machines
ENABLE_LAPTOP_MODE=true

Switch FGLRX_ACPI_SWITCH_POWERSTATES to true

File: /etc/default/fglrx
# Uncomment the next line to enable powerstate switching on ACPI
# events for lid open/close and AC adapter on/off
FGLRX_ACPI_SWITCH_POWERSTATES=true

Additional configure with aticonfig tool

You can configure the driver even further with the aticonfig tool, more information can be found at Configuring.

For example:

  • use powerplay option to switch power state for battery friendly or performance mode
  • use dual head or one big desktop mode
  • turn second monitor on/off on the fly


Specific Issues

3D desktop effects

The new ATI drivers use AIGLX so there is not need to install XGL that older drivers (<>

Remove this section from to the /etc/X11/xorg.conf file. The new xorg server enables "Composite" by default.

# Section "Extensions"
# Option "Composite" "0"
# EndSection

Compiz does not know about the fglrx driver. You can either skip the checks

mkdir -p ~/.config/compiz && echo SKIP_CHECKS=yes >> ~/.config/compiz/compiz-manager

or add it to the compiz white list, and clear the blacklist pci Ids variable *Recommended*

sudo gedit /usr/bin/compiz
# Driver whitelist
WHITELIST="fglrx nvidia intel ati radeon i810"
# blacklist based on the pci ids
# BLACKLIST_PCIIDS="$T"
BLACKLIST_PCIIDS=""


You might have to modify the path for line 30 and 31

   COMPIZ_BIN_PATH="/usr/bin/" # For window decorators and compiz
PLUGIN_PATH="/usr/lib/compiz/"

The COMPIZ_NAME on line 35 should also be modified accordingly

   COMPIZ_NAME="compiz.real" # Final name for compiz (compiz.real)

After the necessary configurations, just restart X and enjoy the cool effects.

If it still does not work, locate /etc/xdg/compiz/compiz-manager.ubuntu [this line may instead be in /etc/xdg/compiz/compiz-manager] and see if it contains an infinite loop in it. If it does, comment out the line that causes the infinite loop.

# . /etc/xdg/compiz/compiz-manager.ubuntu

For Kubuntu you need some extra steps:

sudo apt-get install compiz compiz-kde compizconfig-settings-manager compiz-core compiz-fusion-plugins-main compiz-plugins

To test 3D Effects, press ALT+F2 and type "compiz --replace".

To configure use the tool KMenu->Settings->Avanced Desktop Effect Settings.

Suspend/Hibernation work with 7.12

With Gutsy release, there was a big problem using the ATI proprietary drivers. The Suspend/Hibernate function stopped working. The problem was due to the new SLUB allocator incorporated in 2.6.22 / 2.6.23 Kernel.

The problem has been solved in the AMD Catalyst 7.12 driver release. UPDATE: The problem has NOT been solved in the AMD Catalyst 7.12 driver release.

Suspend/hibernate is not working for FireGL 5250. For FireGL 5200, suspend works with the 7.12 fglrx kernel module loaded (which did not work before this release) , but does not work if X is running.

For Thinkpad T60 with ATI X1400, to get the laptop to wake up from suspend, I had to change the following in /etc/default/acpi-support:

SAVE_VBE_STATE=false

POST_VIDEO=false

Even with the above settings (like POST_VIDEO=false, etc.) my ASUS Z96J with an X1600 does not suspend.

This bug has been a serious issue for several months now. There is a lot of frustration over this, because Ubuntu/Canonical has not been helpful. They've said things like suggesting not using fglrx (thanks a lot, that really helps).

Current status on this bug can be found here: https://bugs.launchpad.net/ubuntu/+source/linux-source-2.6.22/+bug/121653/

If you get /usr/X11R6/lib/modules/dri/fglrx_dri.so not found

sudo ln -s /usr/lib/ /usr/X11R6/lib/modules

If you get /usr/X11R6/lib64/modules/dri/fglrx_dri.so not found

sudo ln -s /usr/lib/ /usr/X11R6/lib64/modules

Segmentation Fault with glxinfo/fglrxinfo

If fglrxinfo or glxinfo returns a Segmentation fault like this:

$ fglrxinfo
display: :0.0 screen: 0
OpenGL vendor string: ATI Technologies Inc.
OpenGL renderer string: ATI Radeon Xpress Series
OpenGL version string: 1.4 (2.1.7170 Release)

Segmentation fault

Set output of libGL to verbose with

$ export LIBGL_DEBUG=verbose

Run fglrxinfo or glxinfo again

libGL: XF86DRIGetClientDriverName: 8.44.3 fglrx (screen 0)
libGL: OpenDriver: trying /usr/lib/dri/fglrx_dri.so
libGL error: dlopen /usr/lib/dri/fglrx_dri.so failed (/usr/lib/dri/fglrx_dri.so: cannot open shared object file: Permission denied)
libGL error: unable to load driver: fglrx_dri.so
display: :0.0 screen: 0
OpenGL vendor string: ATI Technologies Inc.
OpenGL renderer string: ATI Radeon Xpress Series
OpenGL version string: 1.4 (2.1.7170 Release)

Segmentation fault

Don't know if its always fglrx_dri.so, but the fix is to add read permissions to the file.

Check if read permission is not there

ls -l /usr/lib/dri/ |grep fglrx_dri
-rw-rw---- 1 root root 17462688 2008-01-13 17:42 fglrx_dri.so

Add read permission

$ sudo chmod +r /usr/lib/dri/fglrx_dri.so

Check read permission

ls -l /usr/lib/dri/ |grep fglrx_dri
-rw-rw-r-- 1 root root 17462688 2008-01-13 17:42 fglrx_dri.so

libGL error

  • fglrxinfo gives: libGL.so.1: cannot open shared object file.
  • Check the permission of the libGL.so.1.2 file with command:
 ls -l /usr/lib/libGL*
  • The file permission of libGL.so.1.2 should be "-rw-rw-r--". If the permission reads "-rw-rw----", do command
 sudo chmod o+r /usr/lib/libGL.so.1.2
  • If the permission is correct, fixed with command:
sudo ln -s /usr/lib/libGL.so.1.2 /usr/lib/libGL.so.1


Monitor detection (1680x1050 Resolution Issue)--- SOLVED

As specified in the release notes, "Connecting a display device that supports 1680x1050 to a system running Linux may result in a maximum display resolution of 1280x1024 only being available". (from thread)

[It works with the latest driver]

Fglrx driver does not detect some monitors correctly, so you have to do it manually (google about your monitor spec with keyword: xorg.conf).

For example: Samsung 205BW 1680x1050 monitor needs manually set:

File: /etc/X11/xorg.conf
Section "Monitor"
Option "DPMS"
Identifier "samsung-monitor"
VendorName "Samsung"
ModelName "SyncMaster 205BW"
HorizSync 31.4 - 80.0
VertRefresh 56.000 - 75.000
Modeline "1680x1050" 146.25 1680 1784 1960 2240 1050 1053 1059 1089
EndSection

Section "Screen"
Identifier "samsung-screen"
Device "samsung-device"
Monitor "samsung-monitor"
Defaultdepth 24
SubSection "Display"
Depth 24
Modes "1680x1050"
EndSubSection
EndSection


A possible problem with fglrx.ko conflicts

NOTE: I've run into strange problem building fglrx-kernel-source_8.443.1-1_i386.deb. If pentium-builder is installed, dkms fails to build fglrx.ko for make error (mixed implicit and static pattern rules. Stop.). It is caused by gcc.real and other indirections and wrong gcc version detection. Removing pentium-builder cures the problem.

It's necessary, because sometimes this file is written by other packages, and so there's no 3D acceleration. Check that the file /lib/modules/$(uname -r)/misc/fglrx.ko has been created.

Create the following folder

sudo mkdir /lib/modules/$(uname -r)/volatile

Note: the volatile directory might already exist at this stage then simply continue with the next step.

Create a symbolic link

sudo ln -sf /lib/modules/$(uname -r)/misc/fglrx.ko /lib/modules/$(uname -r)/volatile/fglrx.ko


NOTE : On my Gutsy install, after a reboot this link was always removed automatically leaving me without an fglrx module loaded, and thus no ATI rendering. There have been several ways of getting around this suggested here, and here is the one that worked for me:

sudo gedit /etc/init.d/ati-module-fix

And put this in it:

#!/bin/sh -e

# For loading ATI display drivers

ln -sf /lib/modules/$(uname -r)/misc/fglrx.ko /lib/modules/$(uname -r)/volatile/fglrx.ko
exit 0

Make it executable

sudo chmod ugo+x /etc/init.d/ati-module-fix

Now, make this run before gdm

To check the gdm sequence number,

ls /etc/rc2.d/

The value for [seqno] in the section below should be the gdm sequence number -1.

sudo update-rc.d ati-module-fix defaults [seqno]

Hang at logout

If you experience hangs when logging out (of X) try disabling atieventsd with this command:

sudo /usr/sbin/update-rc.d -f atieventsd remove

Revert to Xorg driver

If (for any reason) the fglrx install fails, you can revert to the Xorg driver by executing

sudo dpkg-reconfigure xserver-xorg

and selecting the "ati" driver, or simply restoring the previous /etc/X11/xorg.conf file, if you made a backup.

You also need to remove the xorg-driver-fglrx or your manually installed drivers to get the 3D acceleration back, since it is provided by file /usr/lib/libGL.so.1.2 which belongs to libgl1-mesa package and which is moved to backup and replaced at the installation of xorg-driver-fglrx (or the manually built) package. In case the removal of the fglrx drivers fails to restore the file from libgl1-mesa, you have to reinstall the package by running:

sudo apt-get install --reinstall libgl1-mesa-glx

Ubuntu Feisty ΑΤΙ Graphic Card Installation Guide

Pre-Installation Checks

Video Card Support

Card Class Supported (8.42.3) Supported (7.12)
Radeon Consumer Cards 9500 to 9800 Yes
Radeon Consumer Cards X300 to X1950 Yes
Radeon Consumer Cards HD 2400 to HD 2900 Yes
FireGL Workstation Cards No Yes

Enable "restricted" Repository

Make sure the restricted repository is enabled in /etc/apt/sources.list or this guide will not work!

System > Administration > Software Sources. Check "Proprietary Drivers for Devices (Restricted)" box.

Disable Composite Extension

In Ubuntu Feisty the Composite extension is enabled by default, however, fglrx does not yet support Composite with DRI. In order to disable Composite you have to edit the xorg.conf file:

gksu gedit /etc/X11/xorg.conf

and add these lines at the end of the file:

File: /etc/X11/xorg.conf
Section "Extensions"
Option "Composite" "Disable"
EndSection

Section "ServerFlags"
Option "AIGLX" "off"
EndSection
  • Note: Xubuntu does not have gedit. The default text editor in Xubuntu is called mousepad.
gksu mousepad /etc/X11/xorg.conf
  • Note: Kubuntu does not have gedit. The default text editor in Kubuntu is called Kate.
kdesu kate /etc/X11/xorg.conf

Another option is to use nano directly from the terminal.

sudo nano /etc/X11/xorg.conf

Installation

Method 1: Install the Driver the Ubuntu Way

sudo apt-get update
sudo apt-get install linux-restricted-modules-generic restricted-manager
sudo apt-get install xorg-driver-fglrx
sudo depmod -a

Note: The second line of the above may not be necessary. If apt says it cannot find the "linux-restricted-modules" package, try line 3. If that fails, check your sources.list (see top of page)

If the system complains about dependencies, use your preferred package manager to download python2.4 and, if necessary, its dependencies.

Method 2: Install the 8.42.3 Driver Manually

  • Note: This is just an alternative installation method for the section above. It might help if you still get 'DRI missing' errors.

Download the ATI driver installer: ati-driver-installer-8.42.3-x86.x86_64.run (this installer is for 32bit and 64bit systems)

Change to the download directory. Make sure that you have the universe and multiverse repositories enabled in /etc/apt/sources.list before doing these steps.

There is a detailed manual with screenshots at Ubuntu Wiki.

By default, Ubuntu does not enable the Universe and Multiverse repositories. But they include some important programs and codecs, so it is highly recommended to activate them.

Install necessary tools:

sudo apt-get update
sudo apt-get install module-assistant build-essential fakeroot dh-make debhelper \
debconf libstdc++5 linux-headers-generic

Create .deb packages:

sudo bash ati-driver-installer-8.42.3-x86.x86_64.run --buildpkg Ubuntu/feisty

Blacklist old fglrx module from linux-restricted-modules:

  • Note: You only need to do this if you've installed the driver from Method 2 above.

As ubuntu's linux-restricted-modules package includes the fglrx module from an old driver version (8.28.8), we have to blacklist this module to make sure the new kernel module which is needed by the new driver will be used instead.

Ubuntu/Gnome users type in:

gksu gedit /etc/default/linux-restricted-modules-common

Kubuntu/KDE users type in:

kdesu kate /etc/default/linux-restricted-modules-common

Add "fglrx" to the line "DISABLED_MODULES"

File: /etc/default/linux-restricted-modules-common
DISABLED_MODULES="fglrx"


Install .deb packages:

sudo dpkg -i xorg-driver-fglrx_8.42.3-1*.deb \
fglrx-kernel-source_8.42.3-1*.deb \
fglrx-amdcccle_8.42.3-1*.deb
  • Note: If you have a 64 bit install, the above dpkg command will likely complain that "Errors were encountered while processing: fglrx-amdcccle". This is because of a dependency of the amdccle package on 32 bit libraries. If you recieve this error, issue the following command after the above dpkg command, which will force the installation of all of the 32 bit dependencies, and then the amdccle package:
sudo apt-get install -f


Remove any old fglrx debs from /usr/src/:

sudo rm /usr/src/fglrx-kernel*.deb

Fix broken dependencies

  • Note: You only need to do this if you have installed previous versions of these drivers using this method before.
sudo apt-get -f install

Compile the kernel module:

  • Note: Since Catalyst 7.12, this step is not needed anymore, because the fglrx-kernel-source package compiles and installs the module.
sudo module-assistant prepare
sudo module-assistant update
sudo module-assistant build fglrx
sudo module-assistant install fglrx
sudo depmod -a

It's necessary, because sometimes this file is written by other packages, and so there's no 3D acceleration.


Create the following folder

sudo mkdir /lib/modules/$(uname -r)/volatile

Create a symbolic link

sudo ln -s /lib/modules/$(uname -r)/misc/fglrx.ko /lib/modules/$(uname -r)/volatile/fglrx.ko


IMPORTANT: You have to recompile the kernel module after each kernel update!

Configure the Driver

  • Note Method 2 Users: Before you carry out this step you must reboot your machine. Or else the fglrx driver will not be in use on xorg.conf and using the aticonfig options will cause a memory dump and not intialise the Driver properly.
  • Note: An alternative to the aticonfig --initial command is to edit /etc/X11/xorg.conf and replace the string "ati" with "fglrx" in the "Device" section. This way you won't lose your old "Screen" and "Monitor" settings. Afterwards you can use aticonfig for setting overlay etc. Another alternative is aticonfig --initial --force if you encounter issues with the first command.
sudo aticonfig --initial

Then:

sudo aticonfig --overlay-type=Xv
  • Note: Is there an alternative to the previous step?

Finish the Installation

Now save any open document and reboot your system:

sudo shutdown -r now
  • Note: An alternative to rebooting is to restart the X Server by pressing your CTRL ALT BACKSPACE keys. You must remove any old kernel modules such as "drm" "radeon" or "fglrx" using the "rmmod" command. Example: sudo rmmod fglrx

Post-Installation Checks

[edit] Verifying

Run the following command to check its output to ensure the fglrx driver is installed properly:

$ fglrxinfo
display: :0.0 screen: 0
OpenGL vendor string: ATI Technologies Inc.
OpenGL renderer string: ATI MOBILITY RADEON 9600/9700 Series
OpenGL version string: 2.0.6650 (8.40.4)

The OpenGL vendor string should read ATI and not Mesa.

If you see a message like 'Xlib: extension "XFree86-DRI" missing on display ":1.0"' then you may have to add the following to /etc/X11/xorg.conf (see [1]):

File: /etc/X11/xorg.conf
Section "Extensions"
Option "Composite" "Disable"
EndSection

Additional configure with aticonfig tool

You can even more configure the driver with the aticonfig tool, more information can be found at Configuring.

For example:

  • use powerplay option to switch power state for battery friendly or performance mode
  • use dual head or one big desktop mode
  • turn second monitor on/off on the fly


Ubuntu-specific Issues

Revert to Xorg driver

If (for any reason) the fglrx install fails, you can revert to the Xorg driver by executing

sudo dpkg-reconfigure xserver-xorg

and selecting the "ati" driver, or simply restoring the previous /etc/X11/xorg.conf file, if you made a backup.

You also need to remove the xorg-driver-fglrx or your manually installed drivers to get the 3D acceleration back, since it is provided by file /usr/lib/libGL.so.1.2 which belongs to libgl1-mesa package and which is moved to backup and replaced at the installation of xorg-driver-fglrx (or the manually built) package. In case the removal of the fglrx drivers fails to restore the file from libgl1-mesa, you have to reinstall the package by running:

sudo apt-get install --reinstall libgl1-mesa

If suspend is not working

If suspend stops working after fglrx installation, meaning display will not initialize after attempting to resume, then changing a few options has been reported to work for some hardware.


For ATI X700 and ATI X1100 on Acer Aspire 5051:

File: /etc/default/acpi-support
SAVE_VBE_STATE=false
POST_VIDEO=true
USE_DPMS=false

For ATI X1300 and the ATI X1400 on a Dell Inspiron 9400 or Lenovo Thinkpad T60, also for ATI X1600 on Asus Z96J (using install method 2):

File: /etc/default/acpi-support
POST_VIDEO=false

Oδηγός ρύθμισης compiz-fusion

Αποτελεί έναν πολύ εύκολο οδηγό προκειμένου να ενεμερώσετε και να ενεργοποιήσετε άμεσα στο σύστημα σας το compiz-fusion αφού πρώτα έχετε 'πάρει' τους κατάλληλους drivers για τη κάρτα γραφικών σας !
(Από προσωπική εμπειρία χρησιμοποιείστε nvidia κάρτες γραφικών όπως αναφέρουν και οι δημιουργοί των περισσότερων εκδόσεων Linux καθότι θα δυσκολευτείτε έντονα και ίσως να αποτύχετε εαν προσπαθήσετε να εφαρμόσετε με ΑΤΙ κάρτες γραφικών εξειδικευμένα γραφικά στο σύστημα σας.)

Το compiz-fusion μπορεί να έρχετε με δυνατότητα εύκολης ενεργοποίησης στο ubuntu αλλά θέλει μερικές ρυθμίσεις για μπορέσουμε να δούμε όλα τα εφέ του.Πρώτα θα πρέπει να εγκατασταστήσουμε το compizconfig-settings-manager δηλαδή τον διαχειριστή ρυθμίσεων του compiz-fusion μέσω synaptic η δίνοντας σε κονσόλα
sudo apt-get install compizconfig-settings-manager

Kαλό είναι να εγκαταστήσουμε και τον theme manager emerald.Η εγκατάσταση και εδώ θα γίνει μέσω synaptic η από κονσόλα δίνοντας

sudo apt-get install emerald


Στο kubuntu για να ενεργοποιήσουμε το compiz εκτός από τα παραπάνω πακέτα θα πρέπει να εγκαστήσουμε και τα

compiz-core
compiz-fusion-plugins-extra
compiz-fusion-plugins-main
compiz-kde
compiz-plugins
libcompizconfig0
python-compizconfig
libcompizconfig-backend-kconfig
libdecoration0
libemeraldengine0

H ενεργοποίηση του compiz-fusion στο ubuntu γίνετε μέσω του μενού

Σύστημα>προτιμήσεις>Εμφάνιση

Στο παράθυρο που θα ανοίξει πάμε στην καρτέλα Visual Effects και ενεργοποιούμε την επιλογή Extra


Στο kubuntu για να το ενεργοποιήσουμε πατάμε alt+f2 και στο πεδίο που θα ανοίξει γράφουμε

compiz

Αν θέλουμε να απενεργοποιήσουμε το compiz κάνουμε την ίδια διαδικασία και στο πεδίο γράφουμε

kwin --replace

Mπορούμε να άλαξουμε και theme στα παράθυρα μας μέσω του πρόγραμματος emerald theme manager.Στο ubuntu θα το βρούμε στο μενού

Σύστημα>Προτιμήσεις

Ενώ στο kubuntu στο

kmenu>Ρυθμίσεις

Μπορούμε να το ανοίξουμε και μέσω κονσόλας αν δώσουμε

emerald-theme-manager


Οταν τρέξουμε για πρώτη φορά το πρόγραμμα δεν έχει κάποιο theme προεγκατεστημενό.Υπάρχουν όμως αρκετά εδω

http://www.gnome-look.org compiz-theme

http://www.kde-look.org compiz-theme
http://www.gnome-look.org beryl emerald theme
http://www.kde-look.org beryl emerald theme

Το μόνο που έχουμε να κάνουμε είναι να κατεβάσουμε το θέμα που μας αρέσει και μετά να το επιλέξουμε μέσω τις επιλογής import του emerald theme manager.

Ας δούμε τώρα και τα εφέ του compiz-fusion και πως μπορούμε να τα ενεργοποιήσουμε.Πρώτα πρέπει να ανοίξουμε το πρόγραμμα

Advanced Desktop Effects Settings

Θα το βρούμε στο ubuntu στο μενού

Σύστημα>Προτιμήσεις

Και στο kubuntu στο

kmenu>Ρυθμίσεις

Μπορούμε να το τρέξουμε και μέσω κονσόλας δίνοντας

ccsm


Ρύθμιση του pager


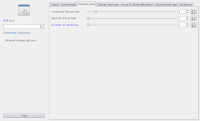
To μεγαλύτερο πρόβλημα που μπορεί να έχει κάποιος αρχικά είναι oι επιφάνειες εργασίας που εμφανίζονται στον pager.Διορθώνετε εύκολα αν πάμε στην επιλογή General και στη καρτέλα Desktop size.Eκει θα πρέπει να βάλουμε το Vertical Virtual Size και το Numper of Desktops στο 1 και το Horizontal Virtual Size στον αριθμό με τις επιφάνειες εργασίας που θέλουμε να έχουμε.


Στο kubuntu λόγο kde αυτή η ρύθμιση μπορεί να μην σας δουλεύει πάντα.Υπάρχει και το πρόγραμμα kicker-compiz που υποτίθεται λύνει τέτοια προβλήματα.Πάντως αυτό το πρόβλημα είναι ήδη δηλωμένο σαν bug στο launchpad.

Εμφάνιση του Κύβου

Για να εμφανίσουμε τον κύβο θα πρέπει πρώτα να ενεργοποιήσουμε από την πρώτη καρτέλα τα

Desktop cube
Rotate cube
Viewport Switcher(Eπιλογέας εικονικής επιφάνειας εργασίας)

Ενώ καλό είναι να ενεργοποιήσουμε και τα

Αντανάκλαση Κύβου
Γρανάζια του κύβου
Cube caps-καλύματα κύβου

Σε κάθε επιλογή υπάρχει και η δυνατότητα ρυθμίσεων.Οπώς την ένταση της αντανάκλασης του κύβου,της ταχύτητας στην περιστροφή του κτλ
Μετά από αυτές τις ρυθμίσεις μπορούμε να εμφανίσουμε τον κύβο κρατώντας πατημένο το ctrl+alt και το αριστερό κουμπί στο mouse.

Desktop cube

Για να ρυθμίσουμε την διαφάνεια που θα έχει ο κύβος κανουμε κλίκ στην επιλογή Desktop Cube και πάμε στην καρτέλα TRansparent Cube και εκεί αλάζουμε το Opacity During Rotation σε όποια τιμή θέλουμε.Μια τιμή γύρω στο 84000 είναι ότι πρέπει.Αν θέλουμε μπορούμε να δούμε και μέσα από τον κύβο αν πάμε στην καρτέλα behaviour και ενεργοποιήσουμε την επιλογή inside cube.Στην καρτέλα appearence μπορούμε να επιλέξουμε και το φόντο ενεργοποιώντας την επιλογή skydome.Υπάρχει και η δυνατότητα να ανεβάσουμε και την φωτογραφία που θέλουμε μέσω της επιλογής Skydome Image.Πολύ καλές skydome pic υπάρχουν εδω

skydome image


Rotate Cube

Από εδώ μπορούμε να ρυθμίσουμε την ταχήτητα του κύβου από την επιλογή speed.Eνω με την επιλογή zoom μπορούμε να βάλουμε σε τι απόσταση θα εμφανίζετε ο κύβος πάνω στην επιφάνεια.

Aντανάκλαση του κύβου
Από αυτή τη επιλογή μπορούμε να ορίσουμε την ένταση και το μέγεθος της αντανάκλασης στο δάπεδο ενώ στο είδος η καλήτερη αντανάκλαση είναι η χοροπηδηχτή :) (cheers στον μεταφραστή)

Γρανάζια του κύβου
Ενεργοποιώντας αυτή την επιλογή εμφανίζονται 3d γρανάζια στο εσωτερικό του κύβου

Cube caps-καλύματα κύβου

Aπό εδώ μπορούμε να ανεβάσουμε κάποια φωτογραφία για να την βάλουμε στην πανω και κάτω πλευρά του κύβου.


Expo
Αν ενεργοποιήσουμε αυτή την επιλογή μπορούμε να εμφανίζουμε μαζί τις επιφάνειες εργασίας μας μαζί με τα περιεχομενά τους.Η ενεργοποίηση του γίνετε αν πάμε το mouse στην αριστερή πάνω πλευρά της οθόνης.Αυτή την επιλογή μπορούμε να την αλάξουμε αν πάμε στην καρτέλα "Eνέργειες" και κάνουμε διπλό κλικ πανω στο κουμπάκι "Συνδυασμοί".
Στην καρτέλα "Εμφάνιση" μπορούμε να ορίσουμε την απόσταση που θα εμφανίζονται οι επιφάνειες,το μέγεθος της αντανάκλασης τους,την κλιμακα καθώς και το χρώμα του δαπέδου.
Στην καρτέλα "Συμπεριφορά" μπορούμε να ορίσουμε την ταχύτητα του εφέ μέσω του zoom αλλά και το είδος της γραφικής απεικόνισης του expo.


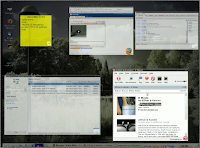
Scale
Η επιλογή αυτή μας επιτρέπει να δούμε όλες τα ανοιχτά προγράμματα που τρέχουν σε κάποια επιφάνεια εργασίας.


Στην καρτέλα "Γενικά" μπορούμε να ορίσουμε την απόσταση που θα φαίνονται τα παράθυρα από την επιλογή Spacing ενώ με την επιλογή speed ρυθμίζουμε την ταχύτητα που θα έχει το εφέ.Στην καρτέλα "Ενέργειες" και στην επιλογή Γενικα>Initiate Window Picker αν κάνουμε κλικ πάνω της μπορούμε να ορίσουμε σε σε ποια γωνία του παραθύρου θέλουμε να πηγαίνουμε το κερσορα για την ενεργοποίηση του εφέ.
Οταν βρισκόμαστε σε κατάσταση scale μπορούμε με δεξί κλικ να φέρουμε ένα παράθυρο μπροστά και με αριστερό κλικ να το ενεργοποιήσουμε.Με μεσαίο κλικ μπορούμε να κλείσουμε το παράθυρο κάποιου προγράμματος.

Wobbly Windows
Για να έχουμε κυματιστά παράθυρα ενεργοποιούμε αυτή την επιλογή.Αν θέλουμε και τα μενού μας να έχουν animation πάμε στην καρτέλα "Γενικά" και βάζουμε την ρύθμιση "Μap effect" στο "shiver"

Επιλογέας Μετατόπισης
Ενεργοποιώντας αυτή την ρύθμιση μπορούμε να δούμε τα ανοιχτά προγράμματα που έχουμε σε μια επιφάνεια εργασίας με πιo όμορφο εφέ από το Scale που είδαμε πιο πάνω.Στην καρτέλα "Εμφάνιση" και στην επιλογή "Μέθοδος επιλογέα" μπορούμε να επιλέξουμε ένα από τα δύο εφέ εμφάνισης που υπάρχουν.Το "Γύρισμα" και την "Κάλυψη".Ενω στην ίδια καρτέλα και στο επιλογή Reflections μπορούμε να ορίσουμε το χρώμα του δαπέδου αλλά και το μέγεθος της αντανάκλασης.Το εφέ ενεργοποιείται με τα κουμπια winkey+shift+s.


Watter Effect
Με αυτήν την επιλογή μπορούμε να εμφανίσουμε βροχή στην επιφάνεια εργασίας μας η καλύτερα μπουρμπουλήθρες που είχα δει να το λέει κάποιος σε ένα forum :).Η ενεργοποίηση του εφέ γίνετε αν πατήσουμε το shift+f9

Γράψτε Με Φωτιά Στην Οθόνη
Ενεργοποιώντας αυτή την επιλογή μπορούμε να γράψουμε κάτι στην οθόνη μας με φωτιά.Η χρήση του εφέ γίνετε αν κρατήσουμε πατημένο το shift+winkey+αριστερο κουμπι στο mouse.
Αν θέλουμε να σβήσουμε ότι έχουμε γράψει πατάμε shift+winkey+c.
Μέσω της καρτέλας γενικά μπορούμε να ρυθμίσουμε την ένταση της φωτιάς μέσα από την επιλογή "Ζωή Στοιχείων Φωτιάς" και το μέγεθος που θα έχουν τα γράμματα μέσα από την επιλογή ¨Μέγεθος Στοιχείων Φωτιάς".Ακόμα μπορούμε να αλάξουμε την εμφάνιση της φωτίας επιλέγοντας το "Τυχαία Χρωματισμένη Φωτιά".


Γραφικές Απεικονίσεις
Από εδώ μπορούμε να ρυθμίσουμε τα εφέ για την γραφική απεικόνιση κλεισίματος,ανοίγματος,σκίασης,εστίασης των παραθύρων,μενού κτλ.Για να επιλέξουμε κάποιο διαφορετικό εφέ πάμε στην καρτέλα που μας ενδιαφέρει επιλέγουμε την πρώτη καταχώρηση στο παράθυρο "Επιλογές Καταχώρησης" πατάμε το κουμπί επεξεργασία και μέσα από το μενου "Εφε" επιλέγουμε αυτό που θέλουμε.Κάτω από αυτο το μενού υπάρχει και η επιλογή "Διάρκεια" για να ρυθμίσουμε την διάρκεια που θα έχει το εφέ.
Στην καρτέλα "Ρυθμισεις Εφέ" μπορούμε να κάνουμε ρυθμίσεις για το κάθε εφέ ξεχωριστά ενώ αν θέλουμε μπορούμε να επιλέξουμε το "Τυχαία Επιλογή Απεκόνισης Για Ολα Τα Γεγονότα"


Εγκατάσταση NVidia driver και compiz για 3D Desktop στο Ubuntu 7.04 (Feisty Fawn)

Πρίν ξεκινήσετε

Βεβαιωθείτε ότι έχετε κάνει όλα τα updates. Αν έχετε σκοπό να εγκαταστήσετε νέο πυρήνα, κάντε το πριν την εγκατάσταση του NVidia driver. Κάθε φορά που εγκαθιστάτε νέο πυρήνα, πρέπει να τρέξετε το αρχείο που κατεβάσατε από την NVidia ξανά για να δημιουργηθεί νέο kernel module.

Ακόμα για να φτιάξετε το kernel module θα χρειαστείτε ένα μίνιμουμ προγραμματιστικών εργαλείων (compiler κλπ) τα οποία πρέπει να εγκαταστήσετε με την εντολή:

sudo apt-get install build-essential

Μπορεί επίσης να χρειαστεί να εγκαταστήσετε τα kernel headers με την εντολή:

sudo apt-get install linux-headers-`uname -r`

Ρυθμίστε τα restricted modules

Ο πυρήνας του 7.04 περιέχει restricted modules, ένα από αυτά είναι της Nvidia. Υπάρχει επίσης πλέον ο νέος restricted driver manager ο οποίος εμφανίζεται στην εκκίνηση και μπορεί να σας εγκαταστήσει αυτόματα τον driver της Nvidia. Μπορείτε ωστόσο να χρησιμοποιήσετε την παρακάτω διαδικασία για να βάλετε τον τελευταίο driver (ο manager πιθανόν θα σας βάλει παλιότερη έκδοση). Για να μην έχετε conflict μεταξύ του nvidia module που διανέμεται με το Ubuntu και αυτού που εγκαταστήσατε:

Κάντε edit το αρχείο:

/etc/default/linux-restricted-modules-common

π.χ. με την επόμενη εντολή:

sudo gedit /etc/default/linux-restricted-modules-common

βρείτε την γραμμή:

DISABLED_MODULES=""

και αντικαταστήστε την με:

DISABLED_MODULES="nv"

Κατεβάστε τον NVidia Driver

Όταν γράφηκε αυτό το άρθρο, ο τελευταίος driver ήταν ο 9755. Μπορείτε να τον κατεβάσετε απευθείας από το site της Nvidia. O driver είναι ένα αρχείο τύπου NVIDIA-Linux-x86-something.run, π.χ.

NVIDIA-Linux-x86-1.0-9755-pkg1.run

Αποθηκεύστε το αρχείο στον κατάλογο σας.

Κάντε το αρχείο εκτελέσιμο με τις εντολές:

cd ~/
chmod 755 NVIDIA-driver-something.run

(Αντικαταστήστε με το σωστό όνομα αρχείου!)

Εγκαταστήστε τον NVidia Driver

Πρώτα από όλα πρέπει να γυρίσουμε σε καθαρό περιβάλλον κονσόλας κλείνοντας τα Χ. Αυτό στο Ubuntu γίνεται με την εντολή:

sudo /etc/init.d/gdm stop

Αν μετά την εκτέλεση βρεθείτε σε μια μαύρη οθόνη με το δρομέα να αναβοσβήνει, απλώς πιέστε ALT+F1 για να γυρίσετε στο πρώτο terminal.

Κάντε ξανά login και εκτελέστε το αρχείο που κατεβάσατε:

sudo ./NVIDIA-driver-something.run

Όταν σας ρωτήσει αν θέλετε να ψάξει στην Nvidia για kernel module απαντήστε no. Απαντήστε yes στην ερώτηση αν θέλετε να κάνει compile το module. Επίσης απαντήστε yes στην ερώτηση για αλλαγή του αρχείου xorg.conf από το πρόγραμμα.

Φόρτωση του module / ρύθμιση xorg.conf

Για να φορτώσετε το module:

 sudo modprobe nvidia

Δεν πρέπει να δείτε κανένα μήνυμα λάθους (για την ακρίβεια κανένα απολύτως μήνυμα...) Επίσης πρέπει να γίνουν κάποιες αλλαγές στο xorg.conf. Μπορείτε να τις κάνετε με την εντολή:

 sudo nvidia-xconfig --add-argb-glx-visuals

Καλό είναι επίσης να ελέγξετε το αρχείο /etc/X11/xorg.conf για να προσθέσετε το παρακάτω (στο τέλος) αν δεν υπάρχει:

 Section "Extensions"
Option "Composite"
EndSection

Για να λειτουργήσει σωστά το 3D χρειάζεται να είστε σε 24 bit χρώμα. Για να το σιγουρέψετε αυτό, προσθέστε:

 DefaultDepth 24

Ένα καλό σημείο για να το βάλετε είναι πάνω από το Option "AddARGBGLXVisuals" "true" (μέσα στο Section "Screen"). Προσέξτε ότι αν ενεργοποιήσετε το 3D Desktop με 16 bit χρώμα δεν θα έχετε Window Decorations (περιγράμματα, πλήκτρα minimize, maximize, close) το οποίο είναι ένα από τα πιο συχνά προβλήματα στο compiz.

Στο σημείο αυτό αν θέλετε μπορείτε να ξεκινήσετε ξανά το γραφικό περιβάλλον με sudo /etc/init.d/gdm start ή μπορείτε να κάνετε επανεκκίνηση πιέζοντας CTRL+ALT+DEL.

Όταν εκκινήσετε το γραφικό περιβάλλον, πρέπει να ελέγξετε αν ενεργοποιήθηκε ο NVidia driver. Αν δείτε το λογότυπο της NVidia στην εκκίνηση, είναι αρκετά πιθανόν ότι όλα δουλεύουν σωστά. Σε κάθε περίπτωση, μπορείτε να τρέξετε την ακόλουθη εντολή:

glxinfo | grep render

και θα πρέπει να δείτε:

direct rendering: yes

Στο σημείο αυτό είμαστε έτοιμοι για το compiz.

Εγκατάσταση και ενεργοποίηση compiz / beryl

To compiz στο 7.04 είναι ήδη εγκατεστημένο και δεν χρειάζεται να κάνετε τίποτα. Αν έχετε κάνει τα παραπάνω, πηγαίνετε απλώς στο System --> Preferences --> Desktop Effects και επιλέξτε το Enable (επιλέγοντας πρώτα τα αντίστοιχα check boxes). Αν θέλετε περισσότερο έλεγχο στο Compiz, εγκαταστήστε το πακέτο gnome-compiz-manager:

sudo apt-get install gnome-compiz-manager

και παίξτε με τις ρυθμίσεις στο System --> Preferences --> GL Desktop

Αν θέλετε να βάλετε το beryl, πάλι τα πράγματα είναι πολύ απλά:

sudo apt-get install beryl

Δευτέρα 28 Ιουλίου 2008

Βασικές Εντολές Σε Unix !!!(για όσους δε κρατούν σημειώσεις στα εργαστήρια) :-)

Basic UNIX commands

Note: not all of these are actually part of UNIX itself, and you may not find them on all UNIX machines. But they can all be used on turing in essentially the same way, by typing the command and hitting return. Note that some of these commands are different on non-Solaris machines - see SunOS differences.
If you've made a typo, the easiest thing to do is hit CTRL-u to cancel the whole line. But you can also edit the command line (see the guide to More UNIX).
UNIX is case-sensitive.

Files

  • ls --- lists your files
    ls -l --- lists your files in 'long format', which contains lots of useful information, e.g. the exact size of the file, who owns the file and who has the right to look at it, and when it was last modified.
    ls -a --- lists all files, including the ones whose filenames begin in a dot, which you do not always want to see.
    There are many more options, for example to list files by size, by date, recursively etc.
  • more filename --- shows the first part of a file, just as much as will fit on one screen. Just hit the space bar to see more or q to quit. You can use /pattern to search for a pattern.
  • emacs filename --- is an editor that lets you create and edit a file. See the emacs page.
  • mv filename1 filename2 --- moves a file (i.e. gives it a different name, or moves it into a different directory (see below)
  • cp filename1 filename2 --- copies a file
  • rm filename --- removes a file. It is wise to use the option rm -i, which will ask you for confirmation before actually deleting anything. You can make this your default by making an alias in your .cshrc file.
  • diff filename1 filename2 --- compares files, and shows where they differ
  • wc filename --- tells you how many lines, words, and characters there are in a file
  • chmod options filename --- lets you change the read, write, and execute permissions on your files. The default is that only you can look at them and change them, but you may sometimes want to change these permissions. For example, chmod o+r filename will make the file readable for everyone, and chmod o-r filename will make it unreadable for others again. Note that for someone to be able to actually look at the file the directories it is in need to be at least executable. See help protection for more details.
  • File Compression
    • gzip filename --- compresses files, so that they take up much less space. Usually text files compress to about half their original size, but it depends very much on the size of the file and the nature of the contents. There are other tools for this purpose, too (e.g. compress), but gzip usually gives the highest compression rate. Gzip produces files with the ending '.gz' appended to the original filename.
    • gunzip filename --- uncompresses files compressed by gzip.
    • gzcat filename --- lets you look at a gzipped file without actually having to gunzip it (same as gunzip -c). You can even print it directly, using gzcat filename | lpr
  • printing
    • lpr filename --- print. Use the -P option to specify the printer name if you want to use a printer other than your default printer. For example, if you want to print double-sided, use 'lpr -Pvalkyr-d', or if you're at CSLI, you may want to use 'lpr -Pcord115-d'. See 'help printers' for more information about printers and their locations.
    • lpq --- check out the printer queue, e.g. to get the number needed for removal, or to see how many other files will be printed before yours will come out
    • lprm jobnumber --- remove something from the printer queue. You can find the job number by using lpq. Theoretically you also have to specify a printer name, but this isn't necessary as long as you use your default printer in the department.
    • genscript --- converts plain text files into postscript for printing, and gives you some options for formatting. Consider making an alias like alias ecop 'genscript -2 -r \!* | lpr -h -Pvalkyr' to print two pages on one piece of paper.
    • dvips filename --- print .dvi files (i.e. files produced by LaTeX). You can use dviselect to print only selected pages. See the LaTeX page for more information about how to save paper when printing drafts.

Directories

Directories, like folders on a Macintosh, are used to group files together in a hierarchical structure.
  • mkdir dirname --- make a new directory
  • cd dirname --- change directory. You basically 'go' to another directory, and you will see the files in that directory when you do 'ls'. You always start out in your 'home directory', and you can get back there by typing 'cd' without arguments. 'cd ..' will get you one level up from your current position. You don't have to walk along step by step - you can make big leaps or avoid walking around by specifying pathnames.
  • pwd --- tells you where you currently are.

Finding things

  • ff --- find files anywhere on the system. This can be extremely useful if you've forgotten in which directory you put a file, but do remember the name. In fact, if you use ff -p you don't even need the full name, just the beginning. This can also be useful for finding other things on the system, e.g. documentation.
  • grep string filename(s) --- looks for the string in the files. This can be useful a lot of purposes, e.g. finding the right file among many, figuring out which is the right version of something, and even doing serious corpus work. grep comes in several varieties (grep, egrep, and fgrep) and has a lot of very flexible options. Check out the man pages if this sounds good to you.

About other people

  • w --- tells you who's logged in, and what they're doing. Especially useful: the 'idle' part. This allows you to see whether they're actually sitting there typing away at their keyboards right at the moment.
  • who --- tells you who's logged on, and where they're coming from. Useful if you're looking for someone who's actually physically in the same building as you, or in some other particular location.
  • finger username --- gives you lots of information about that user, e.g. when they last read their mail and whether they're logged in. Often people put other practical information, such as phone numbers and addresses, in a file called .plan. This information is also displayed by 'finger'.
  • last -1 username --- tells you when the user last logged on and off and from where. Without any options, last will give you a list of everyone's logins.
  • talk username --- lets you have a (typed) conversation with another user
  • write username --- lets you exchange one-line messages with another user
  • elm --- lets you send e-mail messages to people around the world (and, of course, read them). It's not the only mailer you can use, but the one we recommend. See the elm page, and find out about the departmental mailing lists (which you can also find in /user/linguistics/helpfile).

About your (electronic) self

  • whoami --- returns your username. Sounds useless, but isn't. You may need to find out who it is who forgot to log out somewhere, and make sure *you* have logged out.
  • finger & .plan files
    of course you can finger yourself, too. That can be useful e.g. as a quick check whether you got new mail. Try to create a useful .plan file soon. Look at other people's .plan files for ideas. The file needs to be readable for everyone in order to be visible through 'finger'. Do 'chmod a+r .plan' if necessary. You should realize that this information is accessible from anywhere in the world, not just to other people on turing.
  • passwd --- lets you change your password, which you should do regularly (at least once a year). See the LRB guide and/or look at help password.
  • ps -u yourusername --- lists your processes. Contains lots of information about them, including the process ID, which you need if you have to kill a process. Normally, when you have been kicked out of a dialin session or have otherwise managed to get yourself disconnected abruptly, this list will contain the processes you need to kill. Those may include the shell (tcsh or whatever you're using), and anything you were running, for example emacs or elm. Be careful not to kill your current shell - the one with the number closer to the one of the ps command you're currently running. But if it happens, don't panic. Just try again :) If you're using an X-display you may have to kill some X processes before you can start them again. These will show only when you use ps -efl, because they're root processes.
  • kill PID --- kills (ends) the processes with the ID you gave. This works only for your own processes, of course. Get the ID by using ps. If the process doesn't 'die' properly, use the option -9. But attempt without that option first, because it doesn't give the process a chance to finish possibly important business before dying. You may need to kill processes for example if your modem connection was interrupted and you didn't get logged out properly, which sometimes happens.
  • quota -v --- show what your disk quota is (i.e. how much space you have to store files), how much you're actually using, and in case you've exceeded your quota (which you'll be given an automatic warning about by the system) how much time you have left to sort them out (by deleting or gzipping some, or moving them to your own computer).
  • du filename --- shows the disk usage of the files and directories in filename (without argument the current directory is used). du -s gives only a total.
  • last yourusername --- lists your last logins. Can be a useful memory aid for when you were where, how long you've been working for, and keeping track of your phonebill if you're making a non-local phonecall for dialling in.

Connecting to the outside world

  • nn --- allows you to read news. It will first let you read the news local to turing, and then the remote news. If you want to read only the local or remote news, you can use nnl or nnr, respectively. To learn more about nn type nn, then \tty{:man}, then \tty{=.*}, then \tty{Z}, then hit the space bar to step through the manual. Or look at the man page. Or check out the hypertext nn FAQ - probably the easiest and most fun way to go.
  • rlogin hostname --- lets you connect to a remote host
  • telnet hostname --- also lets you connect to a remote host. Use rlogin whenever possible.
  • ftp hostname --- lets you download files from a remote host which is set up as an ftp-server. This is a common method for exchanging academic papers and drafts. If you need to make a paper of yours available in this way, you can (temporarily) put a copy in /user/ftp/pub/TMP. For more permanent solutions, ask Emma. The most important commands within ftp are get for getting files from the remote machine, and put for putting them there (mget and mput let you specify more than one file at once). Sounds straightforward, but be sure not to confuse the two, especially when your physical location doesn't correspond to the direction of the ftp connection you're making. ftp just overwrites files with the same filename. If you're transferring anything other than ASCII text, use binary mode.
  • lynx --- lets you browse the web from an ordinary terminal. Of course you can see only the text, not the pictures. You can type any URL as an argument to the G command. When you're doing this from any Stanford host you can leave out the .stanford.edu part of the URL when connecting to Stanford URLs. Type H at any time to learn more about lynx, and Q to exit.

Miscellaneous tools

  • webster word --- looks up the word in an electronic version of Webster's dictionary and returns the definition(s)
  • date --- shows the current date and time.
  • cal --- shows a calendar of the current month. Use e.g., 'cal 10 1995' to get that for October 95, or 'cal 1995' to get the whole year.
---------------------------------------------------------------------------------------

  • jobs --- lists your currently active jobs (those that you put in the background) and their job numbers. Useful to determine which one you want to foreground if you have lots of them.
  • bg --- background a job after suspending it.
  • fg %jobnumber --- foreground a job
  • !! --- repeat the previous command (but CTRL-p, is safer, because you have hit return in addition)
  • !pattern --- repeat the last command that starts with pattern
  • echo $VARIABLE --- shows the value of an environment variable
  • setenv --- lets you set environment variables. For example, if you typed a wrong value for the TERM variable when logging in, you don't have to log out and start over, but you can just do setenv TERM vt100 (or whatever). To see what all your environment variables are set to, type env. The one that you're most likely to have to set is the DISPLAY variable, when using an X-display.
  • unset VAR --- lets you un-set environment variables. Useful, for example, if you've usually set autologout but want to stay logged on for a while without typing for some reason, or if you set the DISPLAY variable automatically but want to avoid opening windows for some reason.
  • source filename --- you need to source your dotfiles after making changes for them to take effect (or log off and in again)
  • load --- will show you the load average graphically
  • ispell filename --- will check the spelling in your file. If you're running it on a LaTeX file use the -T option to tell it to ignore the LaTeX commands. You can create and use your own dictionary to avoid having it tell you that your own name, those of fellow linguists, and linguistics terminology are a typos in every paper you write.
  • weblint --- checks the syntax of html files
  • latex2html --- translates LaTeX files into HTML
  • wn word option --- lets you access the WordNet database and display, for example, synonyms, hypernyms, or hyponyms, depending on the option you select

Command editing in the tcsh

These things are the same as in emacs:

Backspace --- delete previous character
CTRL-d --- delete next character
CTRL-k --- delete rest of line
CTRL-a --- go to start of line
CTRL-e --- go to end of line
CTRL-b --- go backwards without deleting
CTRL-f --- go forward without deleting

Other useful things

TAB --- complete filename or command up to the point of uniqueness

CTRL-u --- cancel whole line

CTRL-p --- show the last command typed, then the one before that, etc.
(you can also use the cursor up key for this)
CTRL-n --- go forwards in the history of commands
(you can also use the cursor down key for this)
CTRL-c --- cancel the processes after it has started

CTRL-z --- suspend a running process (e.g. in order to do something else in between)
you can then put the process in the background with bg
CTRL-l --- redraws the screen

| (piping) --- Lets you execute any number of commands in a sequence.
The second command will be executed once the first is done, and so forth, using the previous command's output as input. You can achieve the same effect by putting the output in a file and giving the filename as an argument to the second command, but that would be much more complicated, and you'd have to remember to remove all the junkfiles afterwards. Some examples that show the usefulness of this:
ls | more --- will show you one screenful at a time, which is useful with any command that will produce a lot of output, e.g. also ps -aux
man ls | grep time --- checks whether the man page for ls has something to say about listing files by time - very useful when you have a suspicion some command may be capable of doing what you want, but you aren't sure.
ls -lR | grep dvi --- will show you all your dvi files - useful to solve disk space problems, since they're large and usually can be deleted.